New Post

Rss

Tuesday 23 December 2008
no image

Quick Christmas update

Well as Christmas fast approaches I've had to put my painting on hold as transporting all the stuff I need to carry on with my infantry project was just going to be too much hassle.

I would have loved to have brought all my stuff down and managed to make it to Exeter for the "Orks Drift 2" battle as mentioned by Col. Gravis, alas I was unable to shirk from family duties. Looks like I'll be keeping my eye open for my local store events in January.

I have now begun work on my Command Squads for the 127th. I'm going to be doing the CSs for platoons 7 and 9 first and then the Regimental Command Squad afterwards.

Basically Platoon 7 CS will consist of a Junior Officer armed with Power Fist and Bolt Pistol (if I can manage a weapon swap), Guardsmen with Vox Caster and 3 Guardsmen armed with Flamers.

Platoon 9 CS will have a Junior Officer with Power Sword and Bolt Pistol (again weapon swap), Guardsmen with Vox Caster and 3 Guardsmen with Grenade Launchers.

My Platoon CSs will all follow the same template: Junior Officer, Vox Caster, 3 Special Weapons. So meltaguns and plasmaguns will be in the other CSs. I'm thinking about redesignating the Platoon and Squad numbers. Making Platoon 1 and 2 veterans/storm troopers and then Platoons 3 onwards normal infantry with Platoon 9 being Conscripts.

I haven't quite finished deciding what to do with the Regimental Command Squad so stay tuned for an update about that.

So my first week of the new year will be spent finishing off those Command Squads. Pictures will be posted on completion. Merry Christmas people - see you next year.
Thursday 18 December 2008
Let there be pictures! Part Three

Let there be pictures! Part Three

Thanks to all of you who have managed to trudge through "Part One" and "Part Two". Now if you haven't died of exhaustion you can take a look at the current armour attached to the Cadian 127th Regiment.

Ok so the first tank is my company command tank for the Emperor's Fist tank company. The tank is 601 Imperator Furor (Emperor's Fury) This is the first tank of the EFTC to come close to completion. I am trying to decide on locations for the transfers, if I should add company markings and also I'm experimenting on my weathering techniques on an old Chimera chassis so I can get them close to right on this beauty. When I was thinking about this tank, I wanted to make sure that it stood out as a command tank, hence all the comms equipment. The equipment on the back of the turret is from FW and the stuff on the side is from the Apocalypse command sprue.

I also wanted to make use of the Hellhammer cannon from my Baneblade kit, so with a bit of cutting and filing the Hellhammer was fitted onto the turret and so the Leman Russ becomes a Conqueror variant. Again helping to make the tank stand out is the beasty FW mine plough. This thing was a right pain trying to put together and caused some frustration but the overall result is very pleasing.

I prefer the idea of having my tanks carrying all the gear they might need for a prolonged campaign - so the backpacks, boxes and fuel cans were a must. Again there is a smattering of FW stuff here and there - I also couldn't help but decide to put a Hunter-Killer Missile on each tank. The last piece of FW kit on the model is the tank commander. Unfortunately midway through painting his right arm, I somehow managed to drop a large and heavy item (wooden box) on the very edge of the gun - hence the demented plasma pistol. I am still please with how good this guys looks though.

On my old tanks I had gone with a Dark Angels Green main coat and then camo in Goblin Green, but having used the Orkhide Shade foundation paint to do my Baneblade, I thought I would continue to use that paint for the rest of my armour. I can't describe how much I love using the foundation paints and the finish is always great. Camo patterns this time were done using Knarloc Green. Overall I think the effect is quite good - but I'm trying to decide what style of camo to use on the rest of the tanks - maybe doing one squadron in one style and the others in a different one.

The next tank is Command Tank 611 Auctorita (Power). This tank hasn't yet got all the extra gear loaded up onto it but is coming along well. My next decision is whether I want to use another FW tank commander or one from the plastic sprues. I don't know if having the FW stuff scattered throughout the whole tank company is a good idea or if it will look to sparse.

Next up is Command Tank 621 Veneratio (Honour). Again not all the gear is loaded on and painting hasn't quite started yet.


Command Tank 631 Glorificus Letum (Glorious Death) has been put together and thats about it. Now extra gear yet and no idea on what damage to put all over it. That currently concludes the EFTC. 4 made, 6 to go :S.

Here we have one of my oldest models, which has been around since I had my Praetorian force. This tank is a quick conversion, with 2 Leman Russ barrels stuck together to turn it into a Vanquisher. Still looks ok, but is in need of an improved paint job and some updating - gotta love the old smoke launchers. I've actually managed to find a picture of my Praetorian command squad and this tank when it was a member of the Praetorian regiment.
And finally to conclude this armour section, we have my FW Artemia pattern Hellhound, which is very dusty. I decided to get this tank as I was missing a Hellhound from my army list, but didn't want to go for the relatively plain model that I had seen around the GW stores i frequented (GW Bluewater, GW Bromley & GW Thurrock). This is yet another example of me being unable to finish a project. I need to glue on the hull mounted weapon and some tracks, put on some transfers and that is it done. Maybe I'll get it done soon.

I'm hoping that soon I will be able to get some pictures on of my Baneblade, Demolisher, Basilisk, other Leman Russ and 2 Sentinels. But that'll probably be after Christmas. Anyway thanks for reading and Merry Christmas and a Happy New Year to you all.
Wednesday 17 December 2008
Let there be pictures! Part Two

Let there be pictures! Part Two

Welcome back for those who have had the patience to read "Part One". In Part Two I'll be explaining the infantry squads from Platoon 9 and also the heavy weapons teams. Unfortunately, the armour will not be included in this part but will be in Part Three, which if this morning is anything to go by, will be on here some time later today - but don't quote me on that.

Right then, the above pictures are of Platoon 9, Squad 931. As you would have seen with Pt One, the squad numbers on the shoulder pads are wrong - this will be changed. Like all my squads this one is near to completion - a quick flesh wash and varnish and they shall be complete.

I used Squad 914 to experiment on a little. The most obvious difference is the guardsman in the picture above with a different basing style. Before this guy, I'd just put some flock on, added some Graveyard Earth paint to it, to give muddy patches and then added some static grass for a variation in colour. I didn't even bother with drybrushing different layers - far too complicated for me. This guy was not majorly different. I just stuck the flock on the side of the base as well. I also put a strip of sand running across part of the base to see what it would like. I'm still a little torn over this idea as to whether it looks good or stupid. Plus it means that I can't put names on the side of the bases or anything similar.

I also had a go at repositioning the hand on the Sergeant to make it look a bit more like he was trying to kill someone or something. I have also robbed some items from the heavy weapons sprues such as the Sergeant pointing arm and head. This was also the first squad I tested my new Citadel washes on - and I'm pleasantly surprised. I've now decided to use this wash over all of the uniforms and also the flesh wash over the skin. I will soon be messing about with trying different skin tones - I doubt that all Cadians are this pasty. The problem before this experiment was I didn't see much point in shading and highlighting a load of troops when they are going to die pretty quickly. I went for a quick easy paint scheme so I could just get them battle ready.

I have a plan on what I'm painting next so I should have the completed Regimental Command Squad done soon, closely followed by the Platoon Command Squads as the army feels disjointed without them.

So the infantry platoons are out of the way onto the heavy weapons. Feel free to point and laugh at some seriously incomplete models. Firstly the mortar teams. These aren't particularly comical although the picture above does kind of look like the model in various stages of completion. Anyway I'm rambling.

The team on the left is very near to being finished. Basically I need to add some detail to the base such as backpacks, ammunition etc. When I started doing these teams I spent absolutely ages painting all of the spare mortar ammo so it can be placed around the emplacement. The middle team is clearly missing another crew member, but I would say its at the same stage of completion as the first team. The mortar in the barrel was just glued carefully in place so as to look like its firing. And the team on the right has only got the mortar stuck down so needs loads of work.

There was meant to be a photo of the front of this lascannon team as well, but my useless camera skills produced a severely out of focus picture - never mind. This lascannon team came about from me sitting around clearing out all my old bits and pieces. I found the base (from the Steel Legion Heavy Bolter team) and the overturned weapon crate during this clear out. Straight away I thought that I could turn this into a different style emplacement - it also meant I could steal the kneeling legs for use in my normal squads (very devious). There is a strut holding up the end of the lascannon by the gunner. It was made out of part of a sprue cut down to fit nicely. I'm trying decide if I want the loader to be firing his lasgun, throwing a grenade or maybe getting shot. Don't know how I would model his upper body taking a hit.


And finally my heavy bolter teams. These teams are once again so close to completion. They merely require some extra detail on the bases. With all my heavy weapons teams I've tried to make them obviously different to each other and I think that so far I've managed to do well at that.

So that concludes Part Two. Part Three will involve the majority of my armoured units so stay tuned.
Let there be pictures! Part One

Let there be pictures! Part One

Finally, after a month and a half, I have managed to get off my arse and take some pictures of the majority of my army. Please bear in mind when you look at these pics that the models and still in varying levels of completion - some may only need to be varnished whereas others obviously haven't even been undercoated yet.

The pictures will be in some sort of order - so HQ to Heavy Support etc. I'll try to explain what's left to do for each picture but I apologise beforehand if I get some things wrong or leave them out all together :).

Ok then first pictures. If you've looked at my blog before you'll recognise this guy from my "We have a picture" blog. He is of course my Regimental Standard Bearer from my Command Squad. This little fella is almost complete, he just needs transfers on each shoulder pad and some highlighting on the flesh. I also need to change the Regiment number at the top of the standard as it currently reads C X L I I I which is 143 - the original Regiment number. This will be changed to C X X V I I (127) so I only have to change 2 of the numerals making my life so much easier. He also just needs a bit more done to the base, I'm going to add a bit of static grass to it.

Next picture. One Lieutenant for a Command Squad, probably for Platoon 7. Like a lot of my models I wanted this guy to look like he was in a war/battle, so wounds and blood were a must. The only problem is, I can't put the Command Squad transfer on his shoulder because of the wounds - oh well. The transfer on the right shoulder is all that is left to be done on this guy. Although looking at it I think I need to do something with his mouth as my painting skill obviously doesn't quite cut it.

Another Lieutenant and one of the only conversions you'll find in my army. As my modelling skills aren't that great I try and avoid complicated and skillful conversions. Instead a weapon or head swap is the most I'll go for. With this guy I wanted something other than the metal models from GW, so using a plastic Cadian model and the power claw arm from the Space Marine Commander set I went about filing and cutting the shoulder so that it would fit snugly. Overall I'm quite impressed with it as the shoulder almost matches the Cadian pads. This Lieutenant will probably be for Platoon 9. Once again this guy needs a transfer or two and the base finishing off.

Oh look more Lieutenants. Not a lot has to be said about these guys. Obviously nothing has been done to them, I got them about a month ago from eBay for £6 for all 3 - bargain. I may use them as squad leaders or do a weapon swap and keep them in a Command Squad - bolt pistol and power sword. I have got another Lieutenant in my army case but I couldn't be bothered to take a pic of him along with some other models.

Preachers. Decided to add some preachers to my army just for a bit more flavour. So I have these guys and the beginning of painting and one with an Eviscerator not even undercoated.

Commissars - don't you just love 'em. I know there are a few Guard players out there that don't really like having Commissars in their army but I have to admit I do. There's just something about the undeniable faith in the Emperor that makes these stalwart advisors a bonus to the battlefield - plus having your heroic senior officer shot for cowardice is always fun. Both of the Commissars need their base completing and a dark grey wash on their cloaks just to break up the dullness a bit. As I like Commissars so much, I have 2 of the new style models waiting to be undercoatd and the current Yarrick model. I'm also hoping to get the Krieg FW Commissars as they look amazing.

Onwards. Platoon 7 - Squads 721 and 741. First of all, I have messed up all of my poorly hand painted squad numbers - and by all I mean on all four infantry squads (2 for Platoon 7 and 2 for Platoon 9). Currently the squad numbers read 712 and 714 which when I checked the Guard Codex is wrong. Therefore I will be repainting the shoulder pads and painting on the correct numbers.

The first 4 pictures are of Squad 721 and the second 5 pictures are of Squad 741. Other than the need to repaint squad numbers, like a lot of the rest of my army these models are almost complete. Only a few odd bits, like touching up the paint, and a wash over the flesh need to be done. As you can hopefully see, all of the models have equipment on their waists. I've done this for two reasons. Firstly, as troops in combat they would be carrying ammunition etc and secondly to cover up any gaps etc from my inability to put models together properly.

Ok, I'm going to have to leave this post at that point for the moment as I have things to do, but do not panic, I will try and get another post done tonight or tomorrow with the rest of the current pictures. Just to give you a teaser, here's a shot of my command tank for my Emperor's Fist tank company. Thanks for reading.
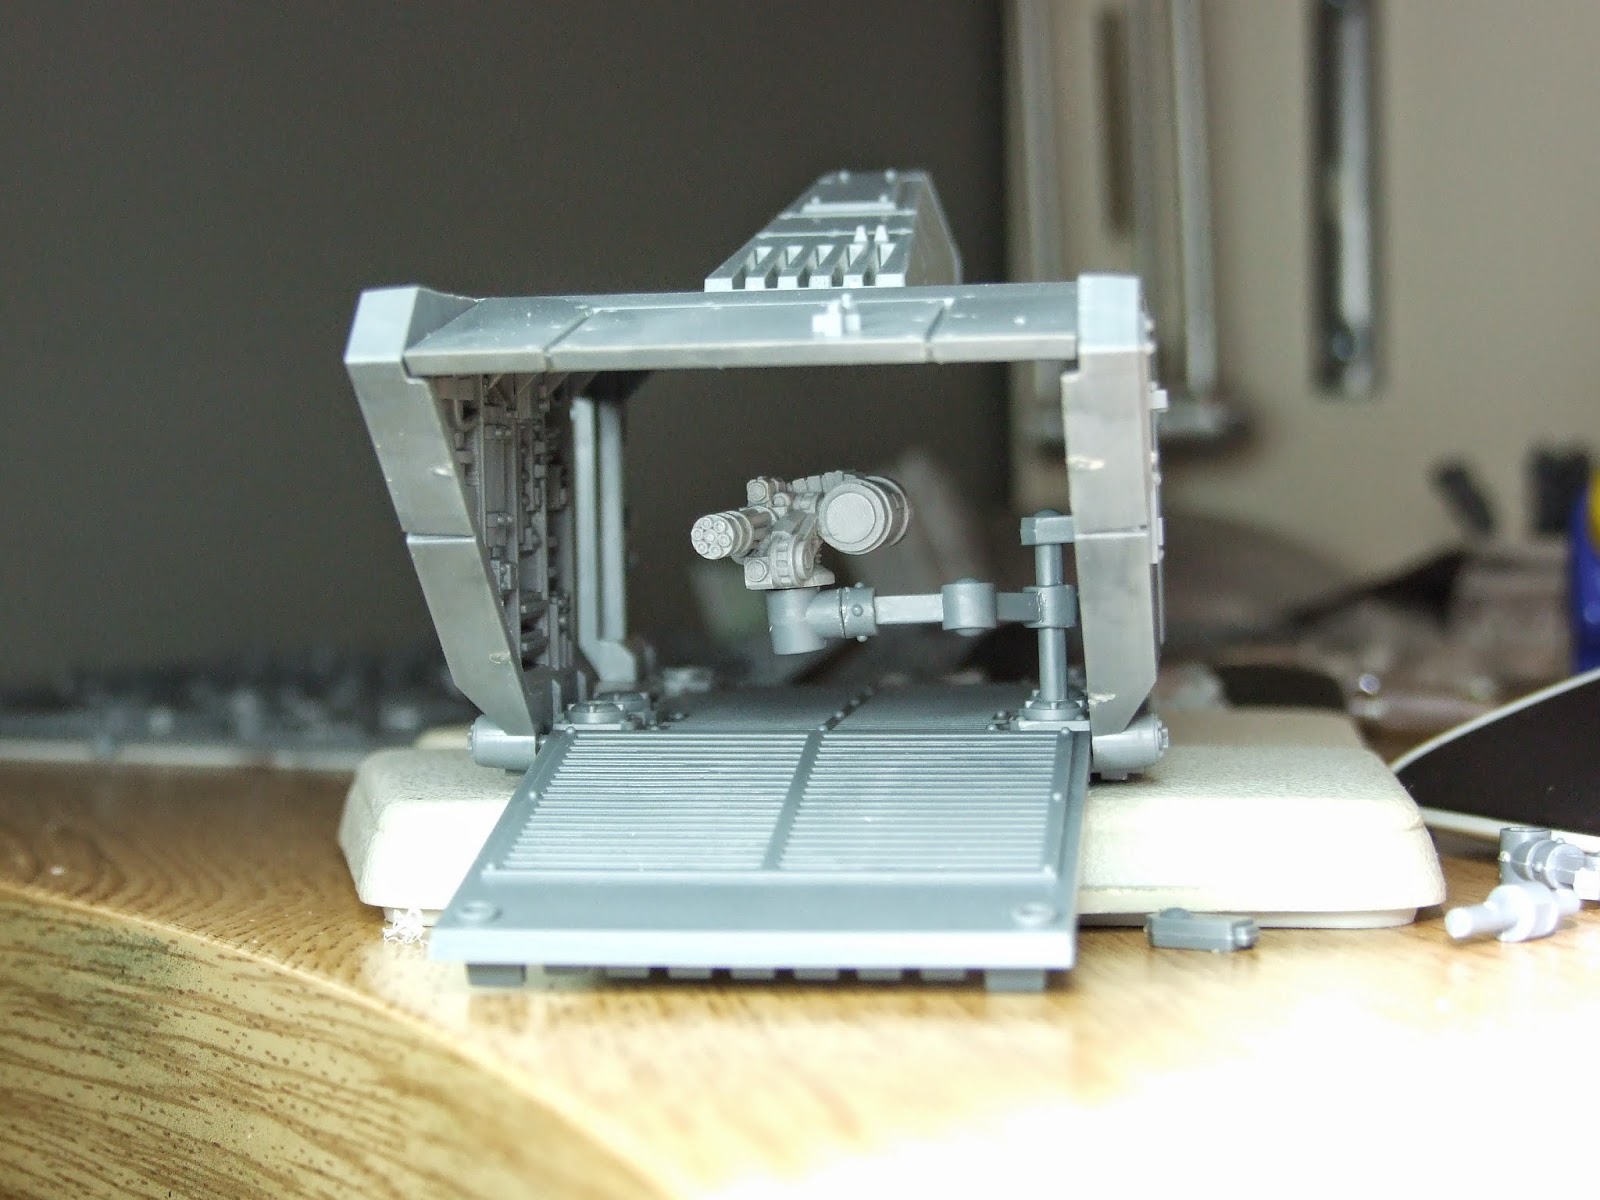


Copyright © 2012 Cadian 127th Regiment All Right Reserved