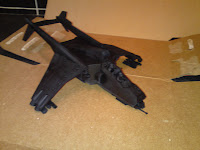
Ride of the Valkyrie, Part 7
Thanks for the ideas and the votes on the poll, the outcome is that the underside of the Valk will be done in the same camo as the rest of the model. Having this weekend off from work meant that I could get some work done on the model (note - I say some work). So I broke out the spray gun and propellant, grabbed the two paints I needed and covered the kitchen table in cardboard (so the missus doesn't kill me - and also as the weather in the UK is somewhat windy).
Things got off to a bit of a bad start as my Orkhide Shade wouldn't mix to the correct green so that went down the drain and I had to break open a new pot, but I eventually got the right colour and consistency, I thought. I also forgot to take any pics of this stage.
I gave the Valkyre a good covering and left it to dry for several hours. However when I came back, there were some pools of paint/water on the model. Turns out I'd used too much water to thin the paint down - school boy error, but never mind. Fortunately, I plan on weathering the model more heavily than my previous tanks so this should cover up the mistakes.
Next up was to get the Knarloc Green. I wanted to try just spraying the camo pattern on rather than masking it all out. Basically, I passed the spray gun over the model in a diagonal line to lay down several light coats of green - and here are the pics of the model with the spraying complete:


The first pics are just to show off the camo pattern accross the whole of the model. I've intentionally left the engines black as I didn't want them to be the same as the rest of the model. I'll be trying out some rust/metal ideas on these.


A couple of shots of the right side of the model. I covered the cockpit section with masking tape as it'll probably be easier to paint from the black base coat.


Some upturned beetle shots to show the camo on the underside. One with the door open and one with the door closed.


And some more underside shots. One shot of the opposite side to the previous pics, and one showing off the whole camo.
Overall I am very very happy with how the camo turned out. Next time though I'll try to take more care with my paint mixes and I perhaps won't do as thick contrasting camo lines.
Thanks for reading and please leave comments and suggestions if you wish. As always they will be appreciated. Cheers.
Things got off to a bit of a bad start as my Orkhide Shade wouldn't mix to the correct green so that went down the drain and I had to break open a new pot, but I eventually got the right colour and consistency, I thought. I also forgot to take any pics of this stage.
I gave the Valkyre a good covering and left it to dry for several hours. However when I came back, there were some pools of paint/water on the model. Turns out I'd used too much water to thin the paint down - school boy error, but never mind. Fortunately, I plan on weathering the model more heavily than my previous tanks so this should cover up the mistakes.
Next up was to get the Knarloc Green. I wanted to try just spraying the camo pattern on rather than masking it all out. Basically, I passed the spray gun over the model in a diagonal line to lay down several light coats of green - and here are the pics of the model with the spraying complete:


The first pics are just to show off the camo pattern accross the whole of the model. I've intentionally left the engines black as I didn't want them to be the same as the rest of the model. I'll be trying out some rust/metal ideas on these.


A couple of shots of the right side of the model. I covered the cockpit section with masking tape as it'll probably be easier to paint from the black base coat.


Some upturned beetle shots to show the camo on the underside. One with the door open and one with the door closed.


And some more underside shots. One shot of the opposite side to the previous pics, and one showing off the whole camo.
Overall I am very very happy with how the camo turned out. Next time though I'll try to take more care with my paint mixes and I perhaps won't do as thick contrasting camo lines.
Thanks for reading and please leave comments and suggestions if you wish. As always they will be appreciated. Cheers.


