133 - Magnets + Manticore = Fun Times
So as well as the eBay rescued Manticore, I also had a brand new one which I've been working on for way too long. There is a reason for this though, and it involves my old friend - magnets!
I've already tried my hand at magnetising a Valkyrie and Shadowsword. Both of which were fairly successful. Next up, was to try my magnetic skills on a Manticore, so that it could be fielded as either a Manticore or a Deathstrike. So read on for my little explanation.

First up is the missile racks, and you'll need 12 magnets for this stage (6 for each rack). This is to allow you to make the missiles removable. Start by drilling a 2mm hole in the centre of each guide section, the four corner areas on the picture above. Test fit a 2mm x 1mm magnet in each hole and then glue them in place, making sure that the polarities are all the same. You want the same polarities so that your missiles can be interchangeable. Repeat this on the other rack.

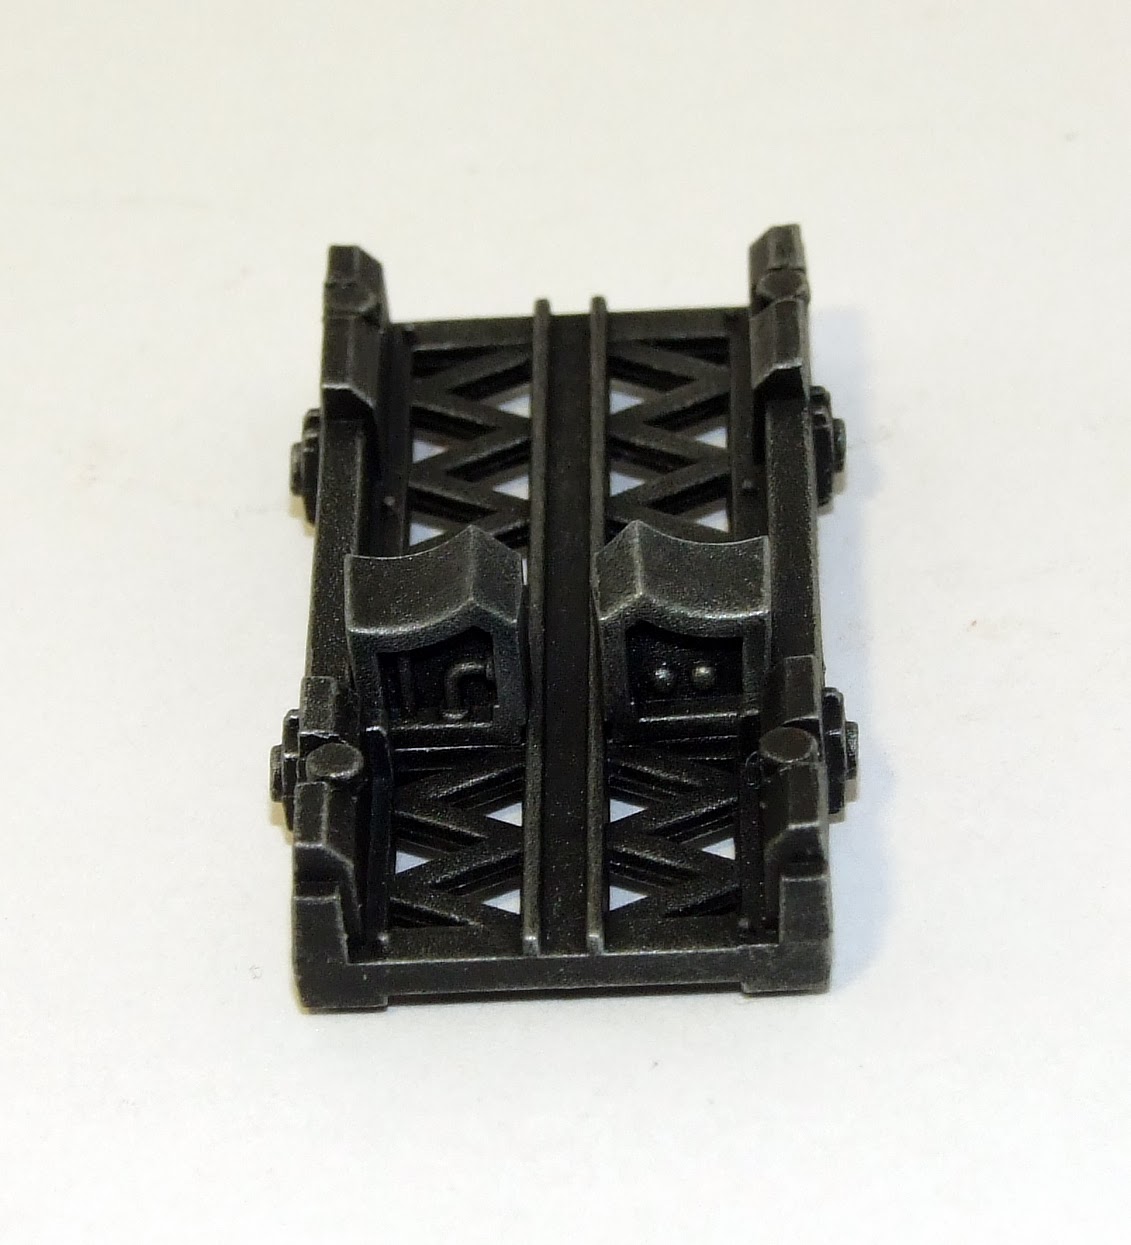
It's now time to put some magnets on the bottom. My work looks a little rough here, but there is a reason for this, which I promise will become apparent in a a few paragraphs time. You'll need to drill five holes on each rack - four on the edges as shown as above. You need to drill the other hole in a different place on each rack. Drill one on the cross piece, like on the picture on the left.
 On the other rack, as shown above, drill the hole along the centre piece.The corner holes need to be a bit deeper so that 1 and a half magnets will fit. The cross piece whole needs to be as large as you can make it as this will be the magnet that holds the racks in place for the Deathstrike. The other four magnets are to hold the racks to the arms that are used for the Manticore.
Test fit your magnets in place, and double check your polarities before using superglue to glue them in position. Once again make sure your polarities are all the same so that the racks can be used on either side.
Test fit your magnets in place, and double check your polarities before using superglue to glue them in position. Once again make sure your polarities are all the same so that the racks can be used on either side.

Now that the racks are magnetised, you'll have to put some magnets on the support arms. You're going to need 8 magnets for this bit - 4 for each arm. Check the polarities against the magnets on the bottom of the racks and then glue the magnets in place as shown above. This can be achieved by putting a magnet on each of the four corner ones on the rack. Then put your superglue on the bottom of the magnets and hold the arms in position. Try to only use a small amount of superglue as any that seeps out will glue the rack to the arms.
The reason I'd left the bottom of the racks slightly untidy on the racks and drilled the holes deeper was so that the magnets on the support arms will be recessed when in place.
The reason I'd left the bottom of the racks slightly untidy on the racks and drilled the holes deeper was so that the magnets on the support arms will be recessed when in place.

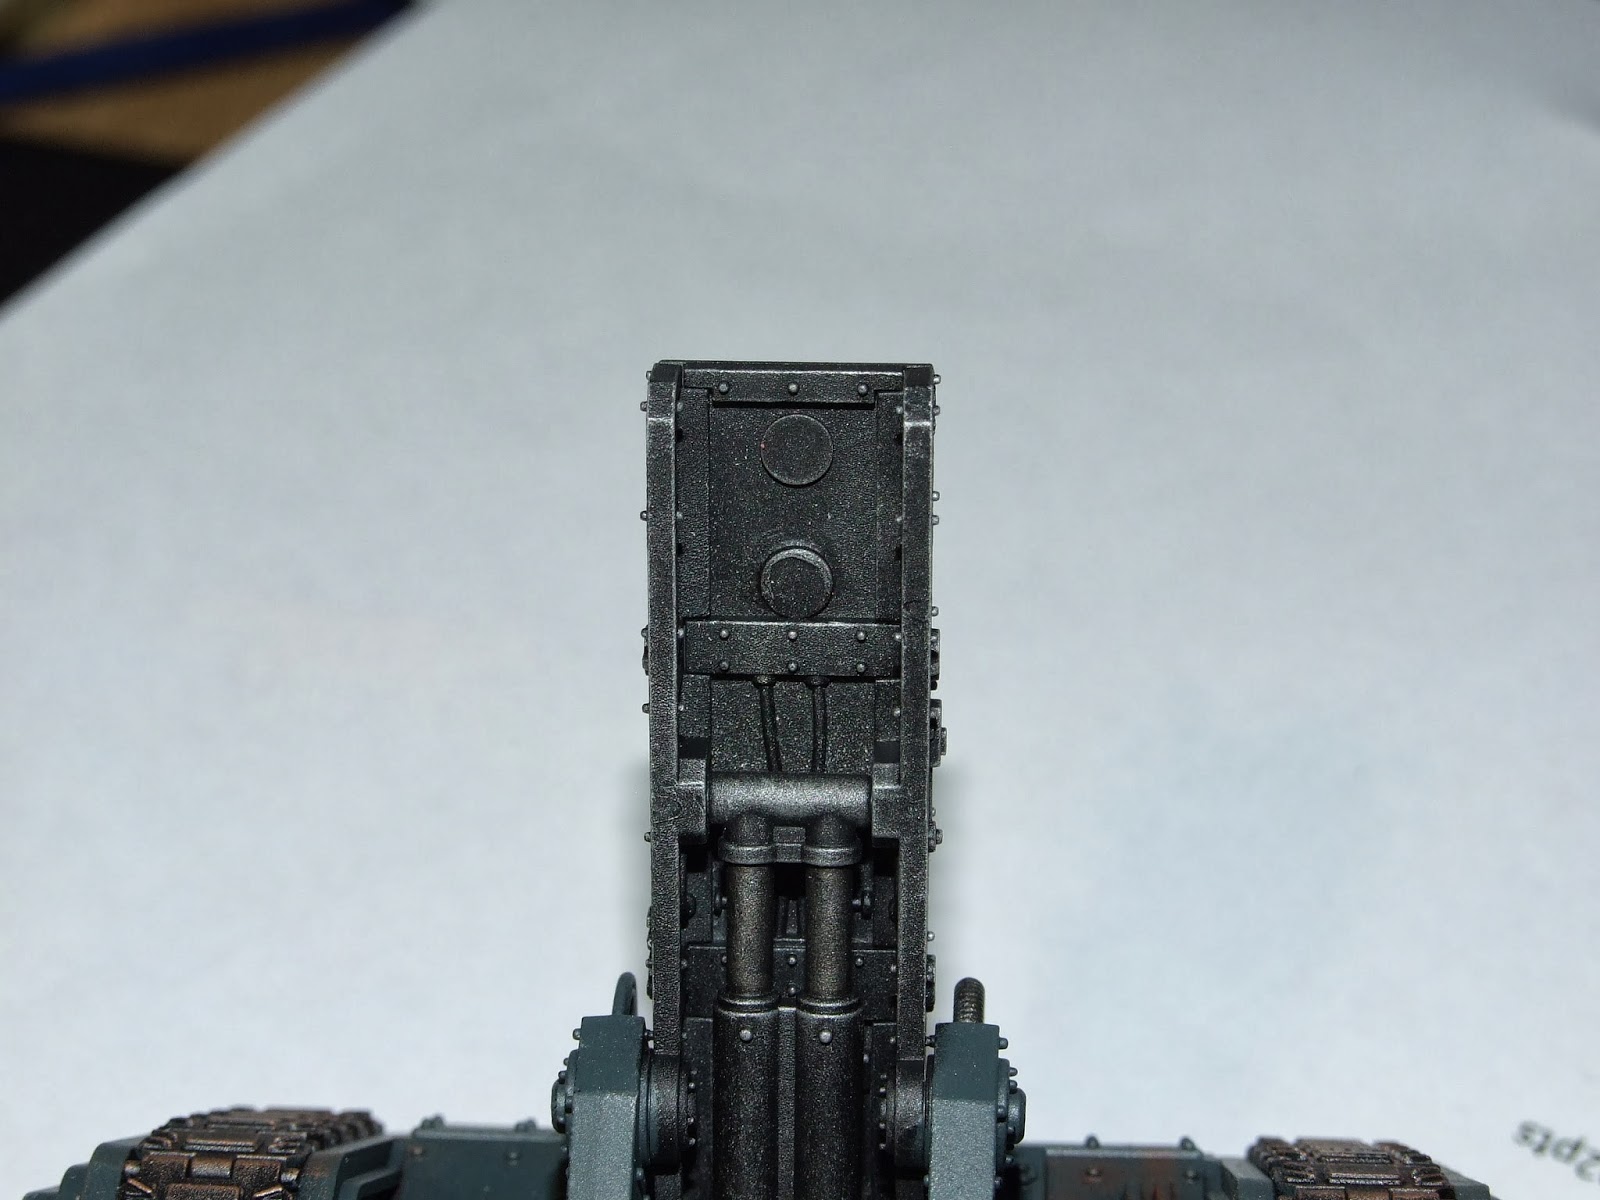
Going back to the racks for a moment, glue two 2mm x 1mm magnet in the trough area that runs horizontally across the rack, one on each side of the centre trough. Repeat this for the second rack. This will be for the Deathstrike guide pieces that can be seen in the picture above. Again make sure that your polarities are the same for both magnets.


As well as adding the magnets to the racks, I added them to the guide pieces as well. Drill a couple of 2mm wide holes in the larger guide piece and one hole in each of the narrower pieces. Make the holes deep enough for a magnet to sit flush in. Check your polarities with the magnets glued on the racks and then glue these magnets in place.


With the structure magnetised, the final piece to complete the missile assembly is the top cover. This is only used for the Manticore. I used 3 magnets for this, but one of these could be swapped for a bit of sprue (a minor superglue accident occurred!). You will need to try and line up the magnets with those that are now on the structure piece. Once you have done this, and checked the polarities are correct, glue the lower magnet in place. There might be some guess work involved in this, but as long as the magnets are near to each other, they should attract.
Finally, glue the bit of sprue (or another magnet) at the top of the cover. When this glue is dry, make sure your magnet is around the right way and glue it in place. These two magnets will now hold the top cover in place when you are using the tank as a Manticore.
Finally, glue the bit of sprue (or another magnet) at the top of the cover. When this glue is dry, make sure your magnet is around the right way and glue it in place. These two magnets will now hold the top cover in place when you are using the tank as a Manticore.

These two variants would be nothing without their missiles! And we're going to start off with the big one - the Deathstrike. Before you glue the two main parts of the missile together, you're going to need some bits of sprue and 8 magnets. I used 3mm x 1mm magnets. Start off by cutting down some sprue so that it fits in the section shown. Do this for all four sections. Then glue a magnet to each bit of sprue. Make sure every magnet is around the same way! I also trimmed off the tip of the smaller missile section as this allows a better fit for the next stage. That's all that needs to be done to the Deathstrike missile.

The smaller missiles are a bit more complicated. I began by taking the halves that will attach to the Deathstrike missile and test fitting them to it. Then I glued 2 magnets to each half, making sure they corresponded with the ones on the Deathstrike. Make sure you check your polarities here. I also glued a small magnet in the nose section of the missile, again keeping the same polarity.
Take the other missile halves and glue in 2 magnets that will match up with the ones on the first half. You should be able to get the polarities sorted without too much trouble. Again, add a small magnet to the nose section. These little magnets help to give the missiles a close fit.
Finally, you will need to add another 2 magnets on the gaps where the missile rack mounts would normally come through. These 2 magnets need to be able to attract the missile racks so use a slightly larger magnet. I warn you now that this is very fiddly, and I did swear a few times whilst trying to get it to work. But with a bit of patience (ok so a lot of patience!), I managed to get the magnets to stay in place.
With those magnets done, you can now add the missiles on to the racks to create a Manticore! Or you can use the separate halves on the Deathstrike missile and field that WMD instead!


The final thing to do with magnets is the hull weapons! Build them as normal, and then grab some magnets. I used a single, larger magnet for the heavy flamer as this was easier. For the heavy bolter, drill two holes (probably a bit more central than mine) and then put in two magnets. Make sure that these are the same polarity direction as the one in the heavy flamer.

Obviously these will need a magnet to be attracted to on the hull. I glued a couple of bits of sprue in place before I built the tank to fill up the mounting hole. I checked to see if one of my larger magnets would have enough strength to attract from inside the tank, and it could. Once you've checked your polarity matches up with the weapons, glue the magnet in place. You can always drill out a hole in the sprue to put the magnet in, if you do not have a large, strong one.
And that is how I magnetised my Manticore! I hope that this has been a useful tutorial (in the loose sense) and if anyone has any questions or needs some more advice just leave a comment and I'll try to answer them as soon as possible.
Thanks for reading, and keep an eye out for the entire finished model appearing on here soon!
2 comments:
Nice work! I was tempted to do this too, as I'm currently working on a Deathstrike but opted not to bother magnetising
@ The Grim Darkness - cheers for the comment. It was a fun but challenging thing to do. Not sure if I'll do it next time though.
Post a Comment