150 - Valkyrie Ramp Gun Conversion: Part 1
My last post showed how I was going to make the Valkyrie appear a little less self-destructive. Well now I'm going to (try to) show you how I did this. Bear with me as sometimes I completely forget what I've actually done.
Before I start, this will be split in to 2 parts. Partly because I don't want to write a massive tutorial that no one want's to read through and secondly because I'm kind of snapping photos and doing this as I go along.
I'd already started to build my Valk before undertaking this conversion, which made it easier for me to try out the ideas. I've only glued one side of the troop compartment to the floor.

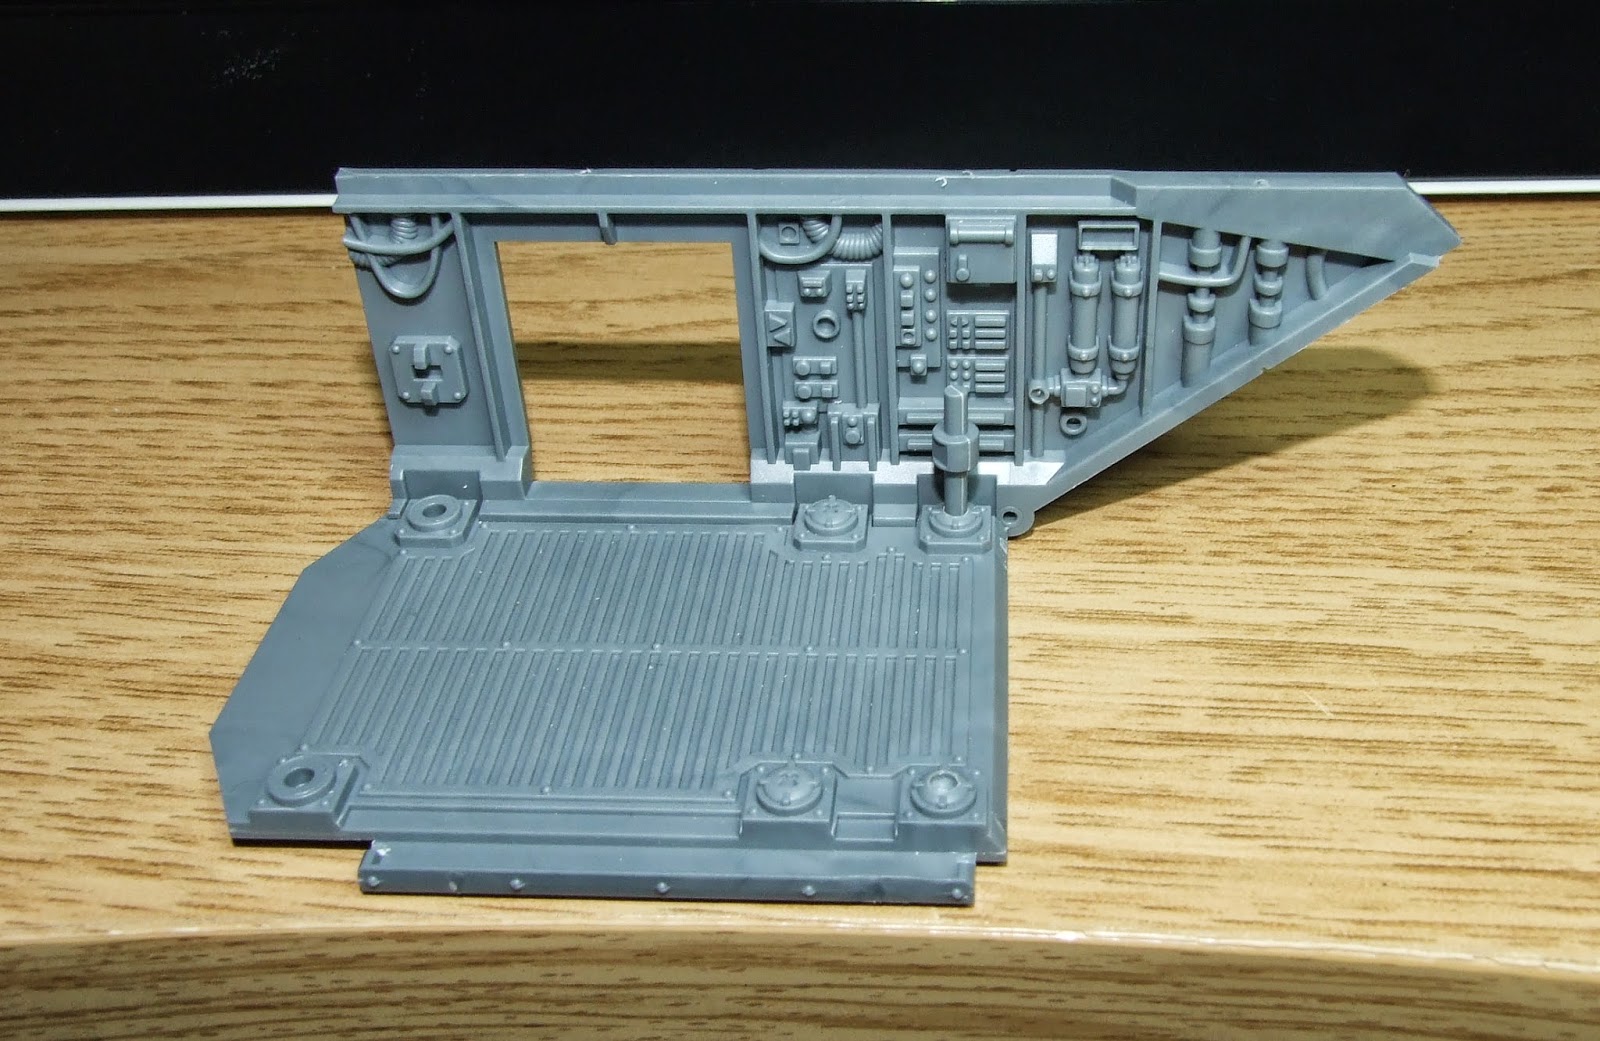
The floor of the compartment has some holes near the side doors for where the guns would normally go. There are also some other similar looking areas towards the rear ramp. Two on each side. They have a cross detail on them as seen above (although I've noticed I've already started the conversion on this picture - oops).

To begin with, I found a small (ish) drill bit and carefully made a pilot hole in the middle of the crosses on the two bits nearest the back. I just held the drill bit and gently turned it to drill into the plastic.

One thing with this conversion, is that it the bits are pretty much all from the Valkyrie kit. So find the pieces that are for the door guns (as shown above). Now you want to grab the middle piece, the central column. With this in hand, choose a drill bit that is the same diameter or smaller than the column. Try not to use one that is bigger as that will make things more complicated.

Go back to those two pilot holes you've drilled and enlarge them using your bigger drill bit. I used a 3/32 inch/2.5mm bit, which allows the column to fit snugly. Again, I just used my hands and gently turned the drill bit between my fingers. This gives you a lot of control so you don't accidentally drill through the whole of the floor.
Test fit your support column to see if the hole you have drilled is wide enough. If not, either find a slightly larger drill bit or angle your current one slightly to make the hole larger. Don't drill the hole too deep. You just want to be able to put the column in the hole so it will stand up on it's own.
I am going to end part one there as it's a good reference point. Part 2 will be posted shortly, and I apologise for the delay.
Thank you for reading and I hope that I have been helpful so far.
0 comments:
Post a Comment