123 - Behold! The Mega Bastion - Part 1
Back in November last year (didn't realise it was that long ago), I grabbed a built and painted bastion when my FLGS closed down. It was pretty poorly put together. Mold lines etc hadn't been cleaned up, so generally it didn't fit together. The paint also a little bit dodgy and basic.
I managed to get the thing broken down into the 4 sides after some work and also got the top battlements off as well. The floor was a bit more difficult, but after a lot of knife work, and a couple of minor breaks (on the plastic, not on me), the floor separated from the walls. Now that it was all a bit more manageable, I tried to strip the paint off using Fairy Power Spray. I had moderate success. In some areas the paint came off pretty easily, but in others it just wouldn't budge. I get the feeling that whoever painted this really went over the top with how much paint they used. Rather than trying to get more of the paint stripped down, the whole thing got chucked in a drawer and left.
Go forward to Christmas of 2012, and I unwrap a few 40k related gifts, including a brand new Bastion and Aegis Defence Line. Cogs began to turn in my head, and images of other people's conversions began to be researched. Well 9 month's later, I've actually decided to try and act on my idea's for the bastion.
Here is how the bastion, or should I say Mega Bastion, stands today!
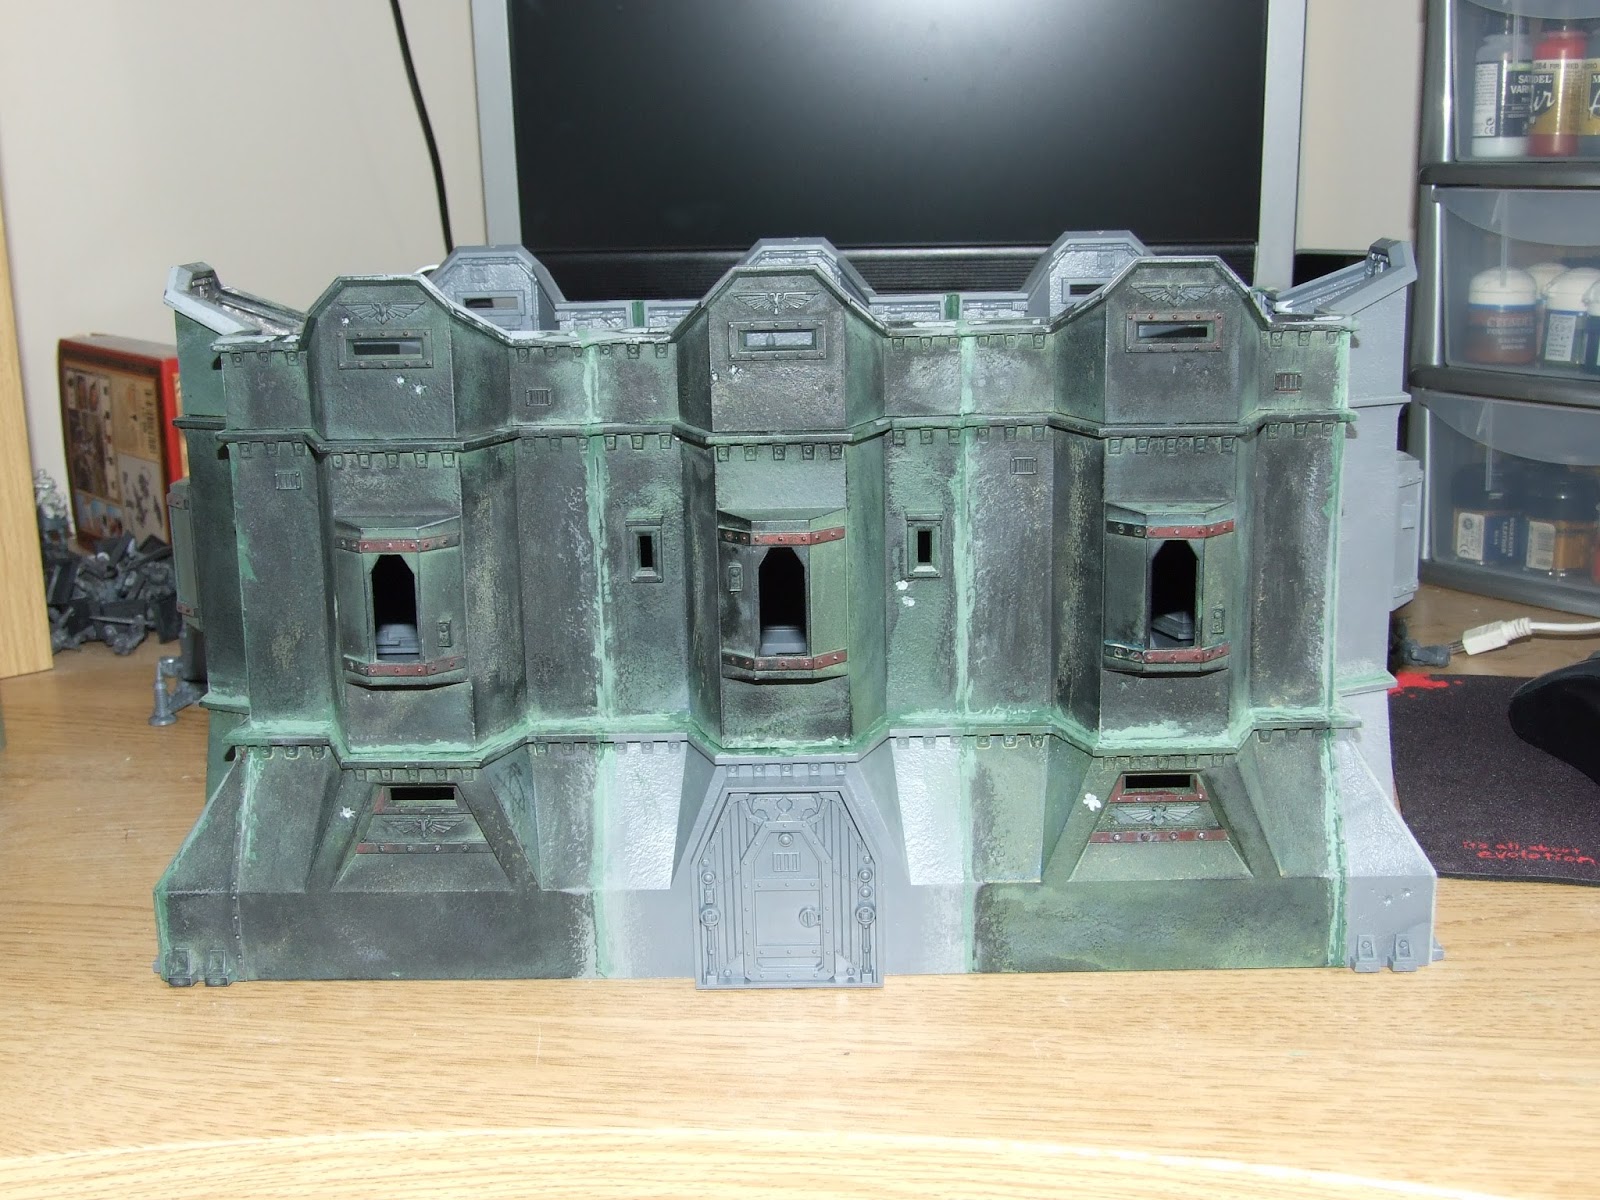
I combined the 2 bastion kits I had to make a larger single one, 1 wall wide and 3 walls long. I contemplated going for 2 walls wide by 2 walls long, but didn't like the squared of look of it (although it would probably be better tactically).

I started off by creating the ends, so one wall for the end and then the corner's. I left the top battelements off for the minute. I had to match up some of the old pieces with each other as when I dismantled the original bastion, some guide pieces snapped off. With the ends finished, I then glued one middle section in between them. Once that had set, I glued the other middle section in.

As you can imagine, there were some gaps created by trying to create such a large fortification. Luckily, they weren't too difficult to fill in. I grabbed my modelling putty and liquid green stuff and set about filling in the gaps. Having left the green stuff to cure, I smoothed the joins down using sand paper, a coarser one to start with and then a less coarse one to get the nice finish on them. I tried not to damage the surrounding texture on the walls.

The bastion now looks a bit like it should, but is still a bit odd without a floor/roof. Here is where I ran in to a little bit of a problem. I had 4 roof sections which was only enough to cover 2 thirds of the roof area. So I now had a couple of choices: look for some spares on eBay, build a roof out of plasticard or bite the bullet and buy the bastion upgrade pack from GW. In the end I bit the bullet. Some may say I'm crazy for going to GW, but there is logic in my madness (somewhere). First of all, I get the floor sections that I need. Secondly, I get the heavy bolters that go in the wall mounts (the battered bastion didn't have any) and thirdly I get all the other extra bits, including another Icarus pattern lascannon.
Come back for Part 2 to hear about how the roof and battlements were done. Thanks for reading!
4 comments:
Mega. There might even be room for a canteen and toilet in there, unlike the tiny normal one.
Wowzers!
Looks good. I'm partial to the 2x2 version with a moat myself.
Thanks for the comments guys.
@ Kevin Spyrle - that moated 2x2 is awesome!
Cheers again.
Post a Comment