New Post

Rss

Showing posts with label forgeworld. Show all posts
Tuesday, 23 June 2020
225 - Praetor Armoured Assault Launcher Part 2

225 - Praetor Armoured Assault Launcher Part 2

Hi everyone. Hope you are all doing well and surviving covid and lock down.

Work commitments have meant I've not had huge amounts of time to get any hobby done. Admin support for the NHS has meant a lot of extra and different work.

I have managed to sneak some hobby time in and have been making progress on the Praetor Armoured Assault Launcher.

I think I need a bigger washing up bowl! This is some of the parts for the Praetor getting ready for a scrub in some washing up liquid. I'd removed some of the flash but hadn't removed any excess resin at this point.

 Some of the larger pieces before their wash. The track units, interior side panels, floor and top armour sections.

Here's the interior section for the left side. There was a little bend on the interior piece but glue and pressure fixed that.

And this is the track unit itself. Nothing too complicated here. There was no major work needed to make this ready to glue, just a few spots where some sanding was needing to get rid of wastegates.

No pics of the stage before this unfortunately. The other track unit was just as easy. I started by gluing the floor piece to the side unit. The rear section needed a little bit of sanding to fit.

Sitting pretty. Everything sits nice and flat so there is no wobble.

Next up is to get the top pieces sorted. So the front top section, there's a mid section, the missile launcher housing itself and the left and right armour tops.

Thanks for reading through.

Stay safe.
Wednesday, 31 October 2018
204 - Bombard Built

204 - Bombard Built

Hello all and thanks for dropping by on this Halloween! 

Nothing too spooky going on here, continuing to build some of the many kits I've had in need of some attention.

This ForgeWorld Bombard has been sat nearly completed for quite a while.

The Bombard has a very neat shell loading crane on the back which lends itself nicely to being magnetised. So a little magnet was added to the base plate.

And one was added to the bottom of the crane arm. Now the crane can be removed for transporting but also can rotate for a little bit of fun.
I also magnetised the cannon - wonky magnet placement again. So it can be removed if needs be. It'll also help with painting it. The cannon had locating pins on each side and I cut these off before drilling a nice hole for each magnet.

Adding the magnets to the cannon supports was much easier as the hole is already there. Some super glue and a magnet on each side later and they are done.

I don't particularly like the classic look hatches that are on most of the ForgeWorld kits so out came the cutters and files and sand paper and the front hatch was removed. I replaced it with a hatch from previous Leman Russ kit which suits my armour a lot better.

Thanks for dropping in and I hope everyone has a great Halloween!!!
Friday, 25 May 2018
202 - eBay Chimera's

202 - eBay Chimera's

Greetings all, and thanks for stopping by.

Just a quick one today to show off some new eBay purchases. I'm sure I'm not the only person who trawls eBay watching and waiting for something specific that's no longer available.

Well I got lucky the past month and picked up some ForgeWorld bits that are tricky to get hold of. So here's what I bought: 

Two of the old style Chimera chassis with plenty of goodies. The left hand Chimera with the decent paint job comes equipped with track guards and a mine plough to compliment it's standard turret.

The Chimera on the right gets quite a few upgrades. Twin heavy bolter turret, track guards and extra armour plus:

The awesome rear door. I really do like this design.

My plan is to remove all the ForgeWorld stuff and use it to add to my set back Chimera's and other vehicles.

Thanks for reading! See you soon.
Sunday, 21 January 2018
197 - Resin Alert - Praetor Armoured Assault Launcher!!!

197 - Resin Alert - Praetor Armoured Assault Launcher!!!

Hello and thanks for stopping by. Today in the fun of a British winter, where clear skies turn to snow and then torrential rain, I made a quick trip to Warhammer World on the way back home. This was a planned trip and I had planned on spending some money.....

Missiley death kind of money. As a present for completing a year long vocational training course, my wife bought me a Praetor Armoured Assault Launcher - click here for the ForgeWorld link.

I had spent quite a bit of time trying to figure out which kit I would like and we both decided on this one.

All the pieces laid out. This is an all resin kit and having had a quick once over, there doesn't seem to be any major flaws.

There are some chunky bits of resin in the kit and the sides are quite blank which could lend themselves to some nice camo design. I'm hoping I can magnetise the different missile load outs as well and maybe the front heavy bolters.

Unfortunately the Praetor was the only thing I ended up buying as I've got way too much to finish to really invest in more. I did want a Marauder bomber/destroyer and the Acastus Knight Porphyrion and the Stormhammer but those will have to wait a while.

Thanks again for dropping by and don't hold your breath for this one to be finished anytime soon!
Saturday, 30 July 2016
183 - Sandpaper and Continual Punishment - H47 Artemia Hellhound: Part 3

183 - Sandpaper and Continual Punishment - H47 Artemia Hellhound: Part 3

I had a bit of spare time so continued with a tiny bit of progress on the Hellhound. In case you've missed the start of this, take a look at Part 1 & Part 2

The promethium tank has been glued in place and only required a small amount of filing on the bottom in order to make it sit flat. The track guards were also tidied up and glued in place.

The green stuff filling was given a quick going over with some fine sandpaper to remove the worst of the rough finish. I didn't spend ages on sanding so hopefully that won't come back to bite me later on. The turret is still loose and will not be glue in place - though I may magnetise the guide peg. I've still got to tackle that wonky barrel as well. Some careful bending will be required as it seems a bit twisted as well.

Not content with one ForgeWorld model to deal with, I bought another one. 

This time round though it's a discontinued Vanaheim Pattern Griffon Mortar. Not a bad find and still a cool looking model.

The Chimera base had been put together and the only resin that has been attached is the base plate/side thing. My only concern is the alignment as the resin isn't level with the inner parts of the Chimera which could make adding the gun shield tricky. Has anyone built one of these before and could offer tips?

Thanks for reading.
Thursday, 28 July 2016
182 - Glue and Green Stuff - H47 Artemia Hellhound: Part 2

182 - Glue and Green Stuff - H47 Artemia Hellhound: Part 2

I knew that putting the Hellhound back together was going to be a bit of a pain - see part 1 for more info. All of my dryfit tests showed there would be gaps in a lot of places which no amount of filing or cutting would easily get rid off. Instead, it would be a battle with green stuff and superglue.

The underneath of the tank was where some of the biggest issues were. I used superglue to attach everything and had to hold it together for a few minutes as the side sections kept trying to detach themselves from the hull.

Once the super glue had dried, I used some green stuff to try and fill in the rather large gaps. I'm not really sure where the tank has joined properly so I went with filling as much as I could. The biggest gaps were at the rear where the resin section was not as wide as the Chimera base. A bit of green stuff later and most of the gaps were taken care of - though I will have to revisit some.

Things on this side of the tank weren't quite as bad and only required s small amount of filling. There was a chunk missing at the front that was more challenging to fill, but I used the flat edge of my knife and the flat edge of a sculpting tool to get the green stuff as square as possible.

The other side was more difficult and there was a substantial gap between the resin and the track unit. Some of the green stuff fell through the gap and is now rattling around inside the tank which is a tad annoying. I took a bit more care after that and managed to get the gap filled in.

Where the resin top joins to the hull also needed some filling which wasn't too bad. At this point I had run out of mixed up green stuff so didn't completely fill the gap. Once everything has dried/cured I'll gently sand it down to tidy up my attempts.

As I know the clean up will never be amazing, I will cover up some of the issues with some track armour. To get all three pieces to fit right, some modification needs to be done to the medium piece. In the right hand picture there are some faint cuts where the piece will be sawn off.

A little bit of sawing later and I'm left with a flat (ish) edge which will connect nicely to the larger track guard.

A quick mock up using some blu tac to hold everything in place. Obscures the view of the green stuff quite well whilst giving the tank a bit of a more rugged look.

And here is the join. I need to smooth the edge's down to get a better fit before gluing anything in place.

The promethium tank will be attached next and I also need to try and straighten the Inferno Cannon.

Thanks for reading.
Thursday, 21 July 2016
181 - From a Sorry State to Just a State - H47 Artemia Pattern Hellhound : Part 1

181 - From a Sorry State to Just a State - H47 Artemia Pattern Hellhound : Part 1

A few months ago I purchased a built and painted ForgeWorld Artemia Pattern Hellhound off of a well known auction site. The tank had been painted to a decent standard and looked like it wouldn't require much work once I'd stripped the paint.

Here is the Hellhound soon after it's arrival on the desk of untidiness. Not too bad a job but requires a bit more work. There were a few bits that hadn't been put together too well but I managed to gently separate most of them without any major damage. I then grabbed the brown Dettol and a few old tupperware containers and left the model to soak for a few hours. After a bit of scrubbing pretty much all of the paint came off, leaving just a few stubborn areas to deal with, but overall a decent result - or so I thought.....

Turns out the person who put this little flaming barrel of death together had a few "issues". Unfortunately, it appears they used a combination of green stuff and superglue to fix these "issues". I'm not going to complain about their model making abilities as I know mine weren't brilliant and probably still require improvement - I just have to spend more time on the prep rather than the painting.

Anyway, here are a few pictures of the pieces before my attempts to put it back together again.

 I've only got round to putting the front plate, bottom and slab of resin that makes up the top piece and fuel tank tub which coincidentally is the piece that needs the most work (look at the battle damage!).

Nevertheless I will persevere and hopefully something will get finished soon.

Thanks for reading.
Thursday, 31 March 2016
177 - Voss Pattern Lightning: Part 3

177 - Voss Pattern Lightning: Part 3

I've made a promise to myself that I will do everything to write a post at least once a month. I've set this target so that I really push myself to do some hobbying as recently I just haven't had the motivation - and with The Division being out, my time is spent on my PS4.

So this months offering is an update on the Voss Pattern Lightning. Having done all of the cleaning, prep and building, I undercoated the fighter with Vallejo Model Air Grey.

With the undercoat done, it was time to try out GW's own airbrush paints. The first one up was Calgar Blue (Air). Only the top of the Lightning was painted using this so the underside would be a different colour.

A few light coats were sprayed on and I tried to make sure everything was covered nicely. Once the paint was dry, I applied some Classic Camo stencils from Anarchy Models HD range.

Yet again I forgot to take a few photos. So the one above shows after I've laid down the stencils, then applied Lothern Blue (Air) and then applied the next layer of stencils. The stencils weren't really playing ball - I had a few problems getting them to stay down on certain areas. It just meant I was a bit more careful when laying down the next colour.

And here is the next colour laid down and with the stencils removed. The final paint was Caledor Sky (Air) and was again laid down in a few light coats. With this being the last layer, I did put it on a little heavier to make sure the coverage was nice and even.

Top down view - quite effective, though the Calgar Blue is a bit more purple than I was expecting.

View from the other side. Unfortunately, I did suffer one spot where the paint came off when removing the stencils. This is right towards the front of the wing tip. A bit of weathering or a repaint will cover this nicely though.

Side view - nothing too complicated here. I tried to carry the patterns over the edges of the wings.

Other side - makes me realise there is a big area of Caledor Sky that I may need to break up on the back edge of the wing.

My plan was always to paint the underside of the Lightning a flat different colour to the top camo. So using some Tamiya masking tape, I taped all around the wings, fins and edge of the fuselage to protect from overspray and get some nice clean lines.

And here is the underside painted in a nice flat Russ Grey (Air). I was really impressed with the coverage and smoothness of this paint. I do need to go over a few areas where it didn't quite cover the blue overspray.

The tape did an excellent job of keeping the camo safe and really did give a nice line - I might use this for all my fliers in the future. Unfortunately, I did have another couple of tiny spots on the front of one wing where the paint came off with the tape - annoying, but very much a quick fix.

This was my first experience of using Games Workshop's new Air range of paints and I quite like them. The coverage is good and even without any airbrush thinner, I didn't experience too much dry tip on the airbrush - something I'd had with the Vallejo Primer.

I neve got around to ordering some empty Vallejo dropper bottles so I had to pour straight from the pot. This was a small inconvenience as the lids kept trying to close, but there wasn't a huge amount of wastage when I'd finished pouring. Trying to get paint that hadn't been used back in the pot was more challenging.

Next up will be weathering and painting the cockpit and weapons.

Thanks for reading!
Tuesday, 22 December 2015
172 - Voss Pattern Lightning: Part 2

172 - Voss Pattern Lightning: Part 2

Just a smidge more progress on the Voss Pattern Lightning Strike Fighter. Last time round I had attempted to fill some of the gaps using liquid green stuff. This resulted in a bit of a mess - as you can see in Part 1.

I spent quite a bit of time sanding down this foul up and making sure that the surface was smooth with minimal signs of the filing/sanding. I also had to use a small drill bit to mark out the original joining holes.

To make things a little less untidy, I used regular green stuff to fill the gaps on the other wing section. Once left to cure for a few days (just to be safe), I trimmed and filed the excess before using some fine sandpaper to smooth the join.

The gap on the underside of the wing was also filled. This was a much harder piece to sand down and is a little less tidy than the top. I had already glued/green stuffed the manoeuvring thrusters in place which impeded my sanding space.

There was a slight gap on one of the tail pieces, so this also got the green stuff treatment. I'm hoping that the surface marks look worse than they actually are.


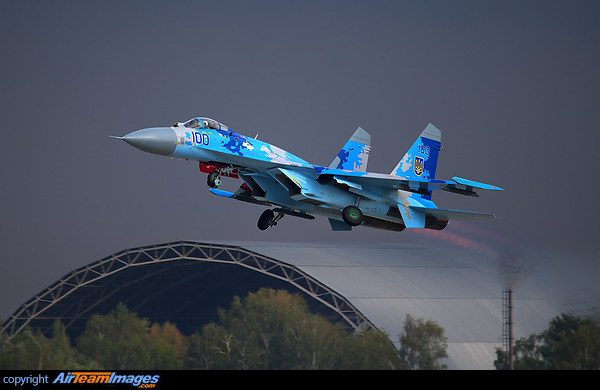
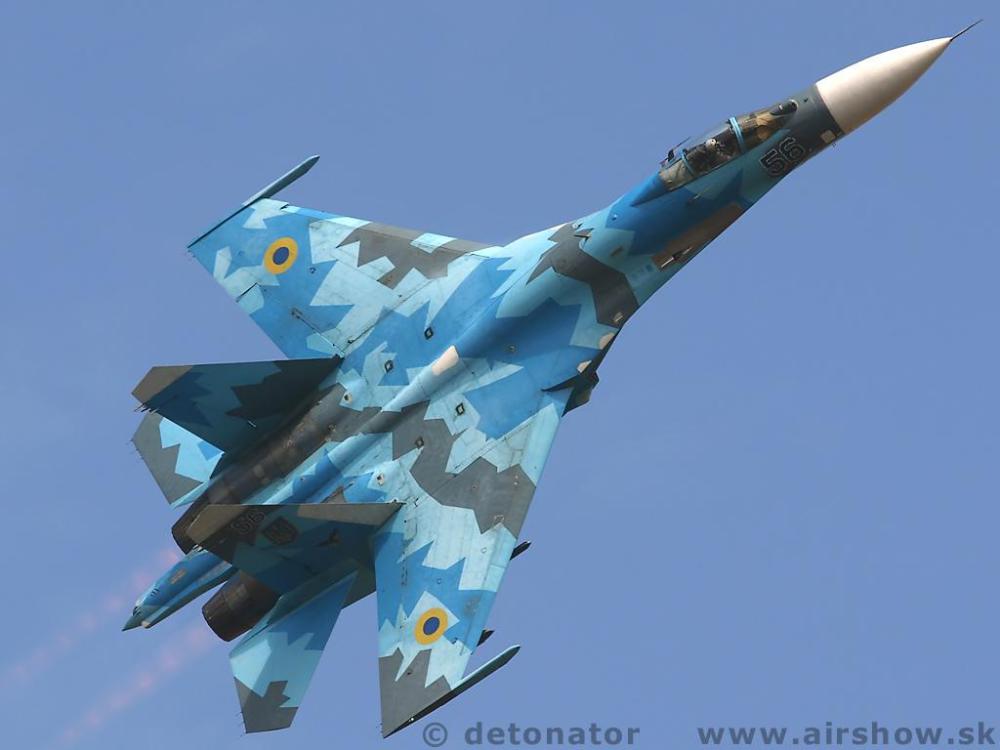
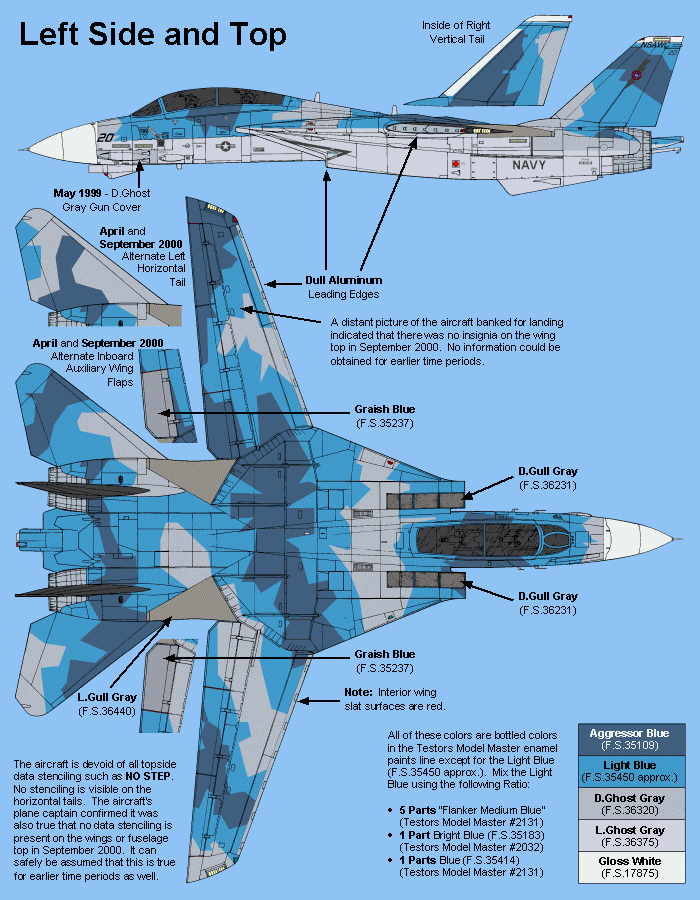
Now I'm planning on using some of my Anarchy Model HD stencils to create the camo pattern on the Lightning and I've got a choice between Hexocam, Digi Camo, Tiger Stripe, Shattered or a Classic Camo. I've used the stencils before on my mega bastion and the 4x4 Bear scout cars. This time round I'll be deviating from my greens and going for blue, aiming for something along these lines:


All images used without the owner's permissions.

I've already gone ahead and bought a selection of blue's and grey's from the new Games Workshop Citadel Air range. I will update this post once I get home with the names of the paints I bought EDIT: I purchased Russ Grey, Calgar Blue, Lothern Blue and Caledor Sky. I want to see how these hold up against the Vallejo Game Air and Model Air paints I normally use - though I do see a problem of them being in regular GW pots rather than dropper style bottles, but I've ordered some empty Vallejo style ones to combat this.

What do you guys think of the blue camo schemes? I want something that will really stand out against my normal green version.

Thanks for reading and an early Merry Christmas and Happy New Year to all of you!
Copyright © 2012 Cadian 127th Regiment All Right Reserved